Owning a hair clipper is a really good thing. However, it is going to come with some responsibilities. Once you’ve bought yourself a clipper.
You will need to do everything possible to keep it in good condition. If you do not, there is a good chance that it is going to break down and you might be required to replace it right away.
With that being said, you will definitely need to learn how to care for your clipper. Learning how to sharpen the blade is vital. Below, you’re going to learn how to do just that and what tools you need.
Clipper Blade Sharpeners
Better Than Replacing?
Many people believe that replacing the blades is best. It is true that you’re going to be required to do so at some point or another. However, this shouldn’t be a requirement.
In fact, it is often best to keep the same blade for as long as humanly possible. This is why you’ll want to learn how to remove and sharpen your clipper blade. It might seem like a real hassle, but it is going to help you save money over a period of time.
Replacing is pertinent at some point, but this should never be your first option. Instead, you should only replace the blade when you absolutely have to.
Sharpening the blade will save you money and it’ll extend the overall lifespan of your clipper. After all, there is always a chance that you’re not going to be able to find replacement blades.
The Perks Of Clipper Blade Sharpening
It is true that learning how to sharpen your clipper’s blade is going to be a hassle. You’ll spend a lot of time and energy figuring it out. Nevertheless, it is going to be well worth it in the long run.
After all, sharpening your own blade is going to save you a significant amount of money. Can you imagine how much it is going to cost to replace your clipper blades?
The costs would be outrageous after a period of time. This is why it is best to learn how to do everything on your own. If you’re able to fix the problem on your own, you’ll be able to avoid buying new blades and you’ll extend the lifespan of the blades that you do have.
Plus, you’re going to be able to remain in complete control. You’ll never have to worry about someone else damaging your blades.
Putting in the time and energy to learn how to sharpen your own blades will be worth it in the long run.
Why You Need To Sharpen The Blades
At the end of the day, blades are going to wear out over a period of time. This is true with clipper blades, knives, and even scissors.
If you do not sharpen the blades, the utensil or tool in question is going to become unusable. With this in mind, it is pertinent to learn how to sharpen the blades from the get-go.
Doing so will make a big difference in your life and it’ll also allow you to keep using the clipper for an extended period of time. Sharpening is one step in the right direction.
Below, you’re going to learn more about the other things you need to do to keep your blades in good condition.
Other Ways To Protect The Blades
Again, sharpening the blades is good. However, this is not the only thing that you need to do. You also need to make sure that you’re taking steps to keep the blades clean and in immaculate condition.
For instance, you need to make sure that the blades are straight. If they get out of alignment, they’re going to cut awkwardly and that will leave you or your client with a horrible haircut.
It is also essential to clean the blades regularly. Otherwise, they’re going to collect a whole lot of hair. In fact, they might even rust over a period of time.
Finally, it is a good idea to learn how to oil the blades. Oiling the blades couldn’t be easier. Just put together a schedule to make sure that you keep the blades oiled sufficiently.
Taking these steps will help protect your investment while keeping your clipper functional for as long as possible. Performing a visual check on the clippers before and after each use is recommended too.
Cleaning The Blades
Before attempting to sharpen the blades, you’ll first want to learn how to clean them. A lot of people use clippers and they never clean them.
This is the very reason that they’re falling apart and the blades are dulling out so quickly. To get started, you’re going to need a screwdriver. Make sure that you unscrew the screws until the blades come free.
This shouldn’t take more than a few seconds. The blades should detach from the clipper without much effort. Now, you’ll want to use the included brush to clean away the hair.
Remove the hair from the clipper and the blade for the best results. When taking the unit apart, you should pay close attention to how everything fits together.
This will make it much easier to reassemble the clipper in the future. To clean the blades, you can use the brush that came with the clipper. If one wasn’t included or you’ve lost it, you can use a toothbrush. Either one should work exceptionally well.
If the blade has developed rust, you will want to remove it with a little bit of water. Using an alcohol solution can help remove rust that cannot be removed with water alone. Be sure to dry the blades thoroughly before moving forward.
Sharpening The Clipper Blade
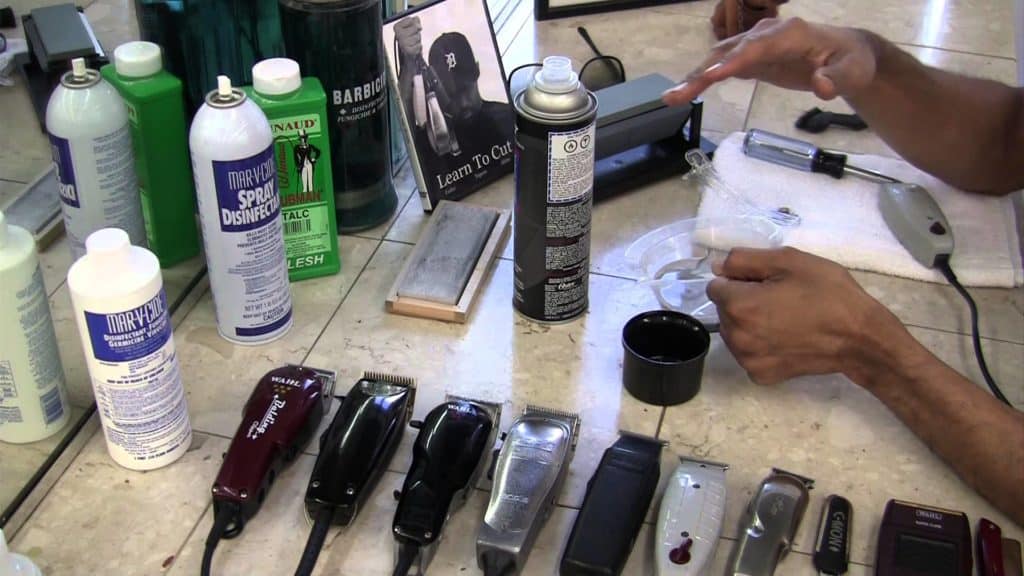
In order to sharpen the clipper blade, you’re going to need a few essential tools. First and foremost, you’ll need a honing stone. This is a specific type of stone that is designed for this purpose. In general, you will be able to purchase one of these stones from your local hardware store.
If they do not have one, you might have to make the purchase online. It is best to choose a 4,000 grit surface. This will provide you with the best results without overdoing it.
If you’re dealing with a ceramic blade, you’ll need to take extra special caution and use a diamond sharpening stone.
Once you’ve got everything you need, it is time to begin sharpening the blade. Do not worry. The process is pretty quick and it won’t cause you to break a sweat.
Using The Stone
Now, you’ll want to grab the blade. Be sure to keep it lighting in your hands. Be gentle or you might just cause more harm than good. It is best to keep the blade at a 30 to 45-degree angle at all times.
Now, you should swipe it across the stone. Be sure to move it forward only. You can swipe it across the stone at least five times. Do not exceed ten times. Once you’ve finished, the blade should appear shiny and new.
It should also be even. Once you’ve finished with the first side, you should flip the blade over and do it again. After that, you’ll need to get rid of the metal powder. The powder is normal. Just wipe it away using a dry towel.
If you want to get the best results, you can repeat this process using a fine honing stone. Stick with a stone with a grit rating of 8,000.
Perform the same steps above and wipe off the metal fragments. After you’ve done that, it is time to reassemble the clippers.
The Final Steps
Once you’ve completed these steps, it is time to finish it off. Now, you need to reassemble the clippers. This should be too tough as long as you remember where everything went.
Take your time and be sure that everything is perfect. Take the screwdriver and tighten the screws. Make sure that everything is secure before moving forward.
After that, you should hold the clipper sideways and look down the top of the blade. Do you notice anything out of the ordinary? Are the blades straight and in perfect alignment?
Fix whatever you must before finishing this step. If you need to realign the blade, you will need to loosen the screws again.
Now, it is time to oil the blades. There is a pretty good chance that your clipper came with a bottle of oil. Grab it because you’re going to need it.
Hold the bottle and let the nozzle sit near the tip of the blades. Squeeze the bottle and let the oil drip onto the blades. Be sure to wipe off any excess oil.
Summary
Learning how to sharpen a clipper blade can be time-consuming and frustrating. You may believe that it is not worth it.
This couldn’t be further from the truth. Take your time and master the process. Doing so will pay off dividends in the long run.
Also, make sure that you have a good stone. Do that and you’ll be well on your way to having a freshly sharpened clipper blade!


